Showing posts with label holiday decor. Show all posts

Tuesday, October 25, 2022

Handcrafted Old World Santa and Snowman using paper machè cones

Hello friends, welcome back.
Last time I told you that I would show you what I did with some small paper machè cones I purchased from 
                                                                             
I started by hot glueing small Styrofoam balls to the top point.
Then I painted the cones white.
Using wool sheeting, (cotton batting works also) I created a hooded coat for Santa. More wool sheeting and a pipe cleaner was used for Santa's arms.
Doll hair for his beard and a paper Santa face from the internet brought him to life.

I trimmed him in gold vintage style tinsel ribbon. 
Santa is holding a glittered star and a tiny bottle brush tree.
Easy and fun!

Next up is a darling cone snowman.

 
Mr. Snowman is a paper cone with a small styrofoam ball glued on as his head
.
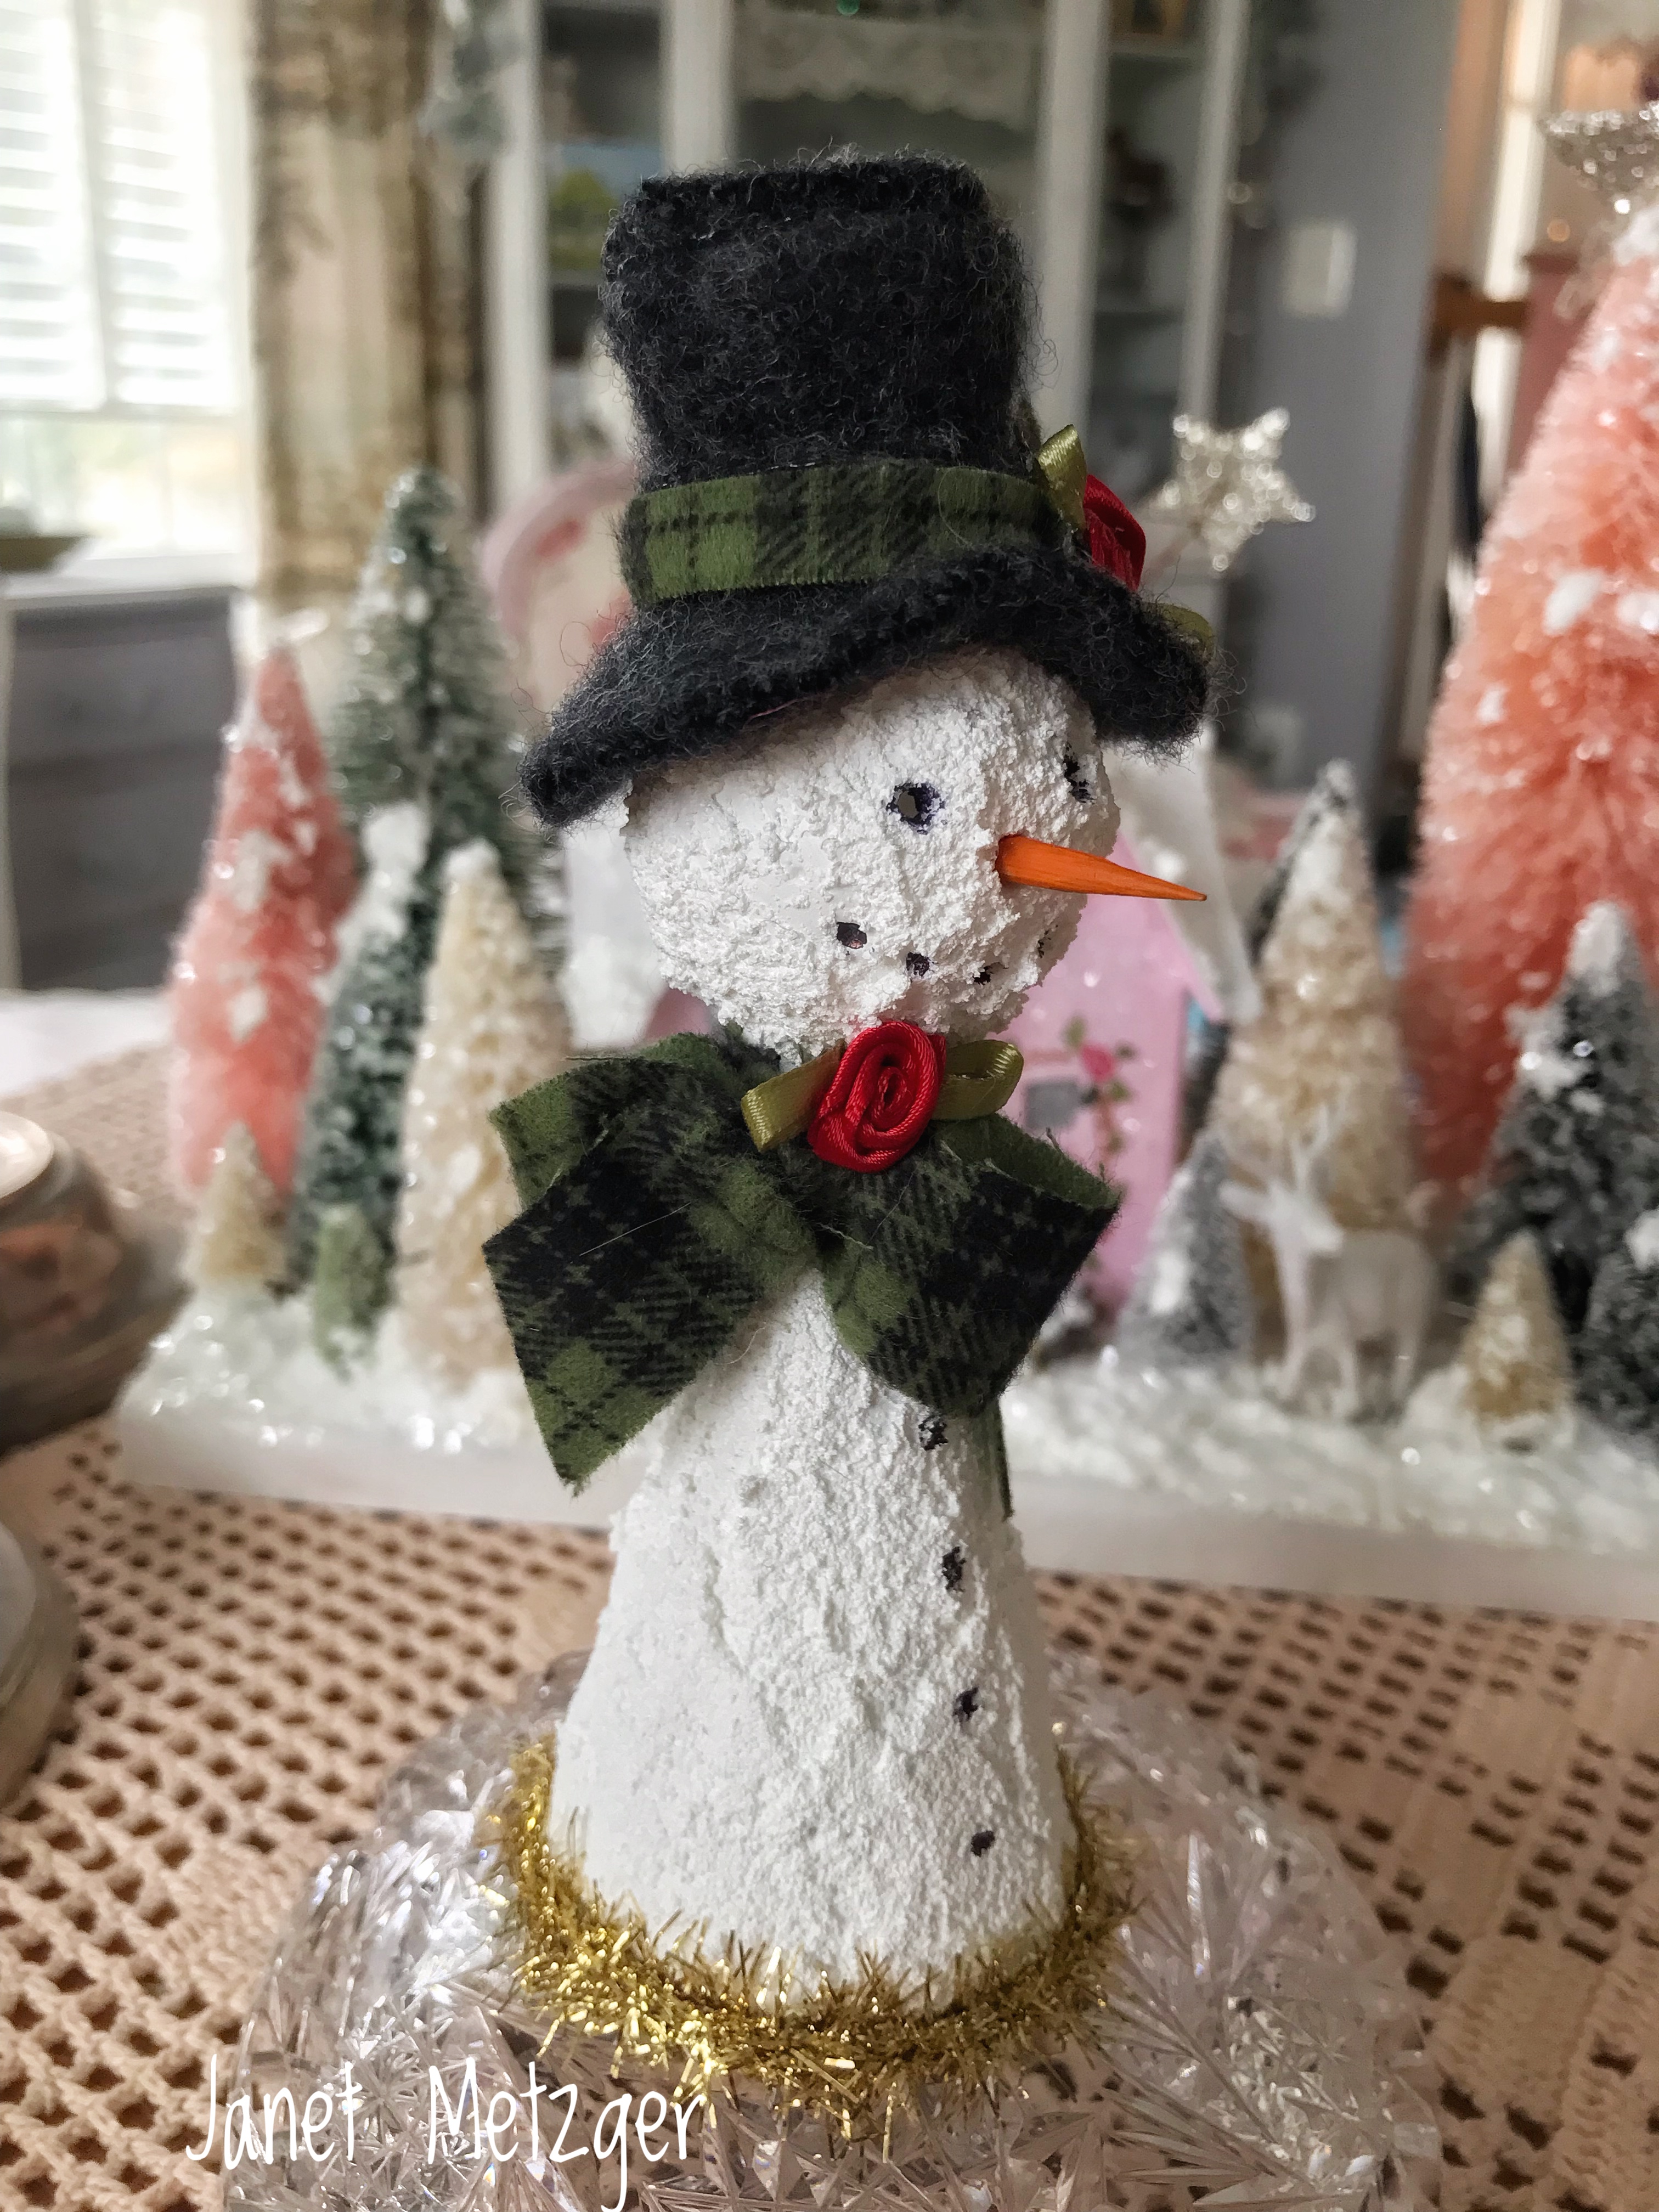
He was covered in Snow-Tex and air dried, until snow 
was hard.

Then I made his top hat from an old thrifted and felted black sweater.
His bow scarf matches his hat trim. 
A piece of a chop stick painted orange makes the perfect snowman nose.

I trimmed his base using the same vintage style gold tinsel ribbon as I used on Santa.
Amazing the holiday fun you can have with paper cones! 
Use them as a tree topper on a small tree or on your holiday dinner table.
These sweet holiday creations look festive sitting on a shelf or windowsill.

I'll showcase more handcrafted ornaments in my next post, so please come back and visit again.
Until next time.
As the Koreans are fond of saying.....stay healthy, eat good and sleep well!
Hugs,
Janet xx

Friday, October 21, 2022

My European Putz house in the forest! Check one off my holiday bucket list

Hello friends, welcome back!
For those that don't know what a Putz house is, 
let me explain and make your world slightly more joyful.
The German word 'putzen' means to decorate or adorn. 
If you would like to learn more about the Putz house, check out 
THIS article. 
I love learning about the history of our holiday traditions.
Let's take a look at what I did with this paper mache Putz house.

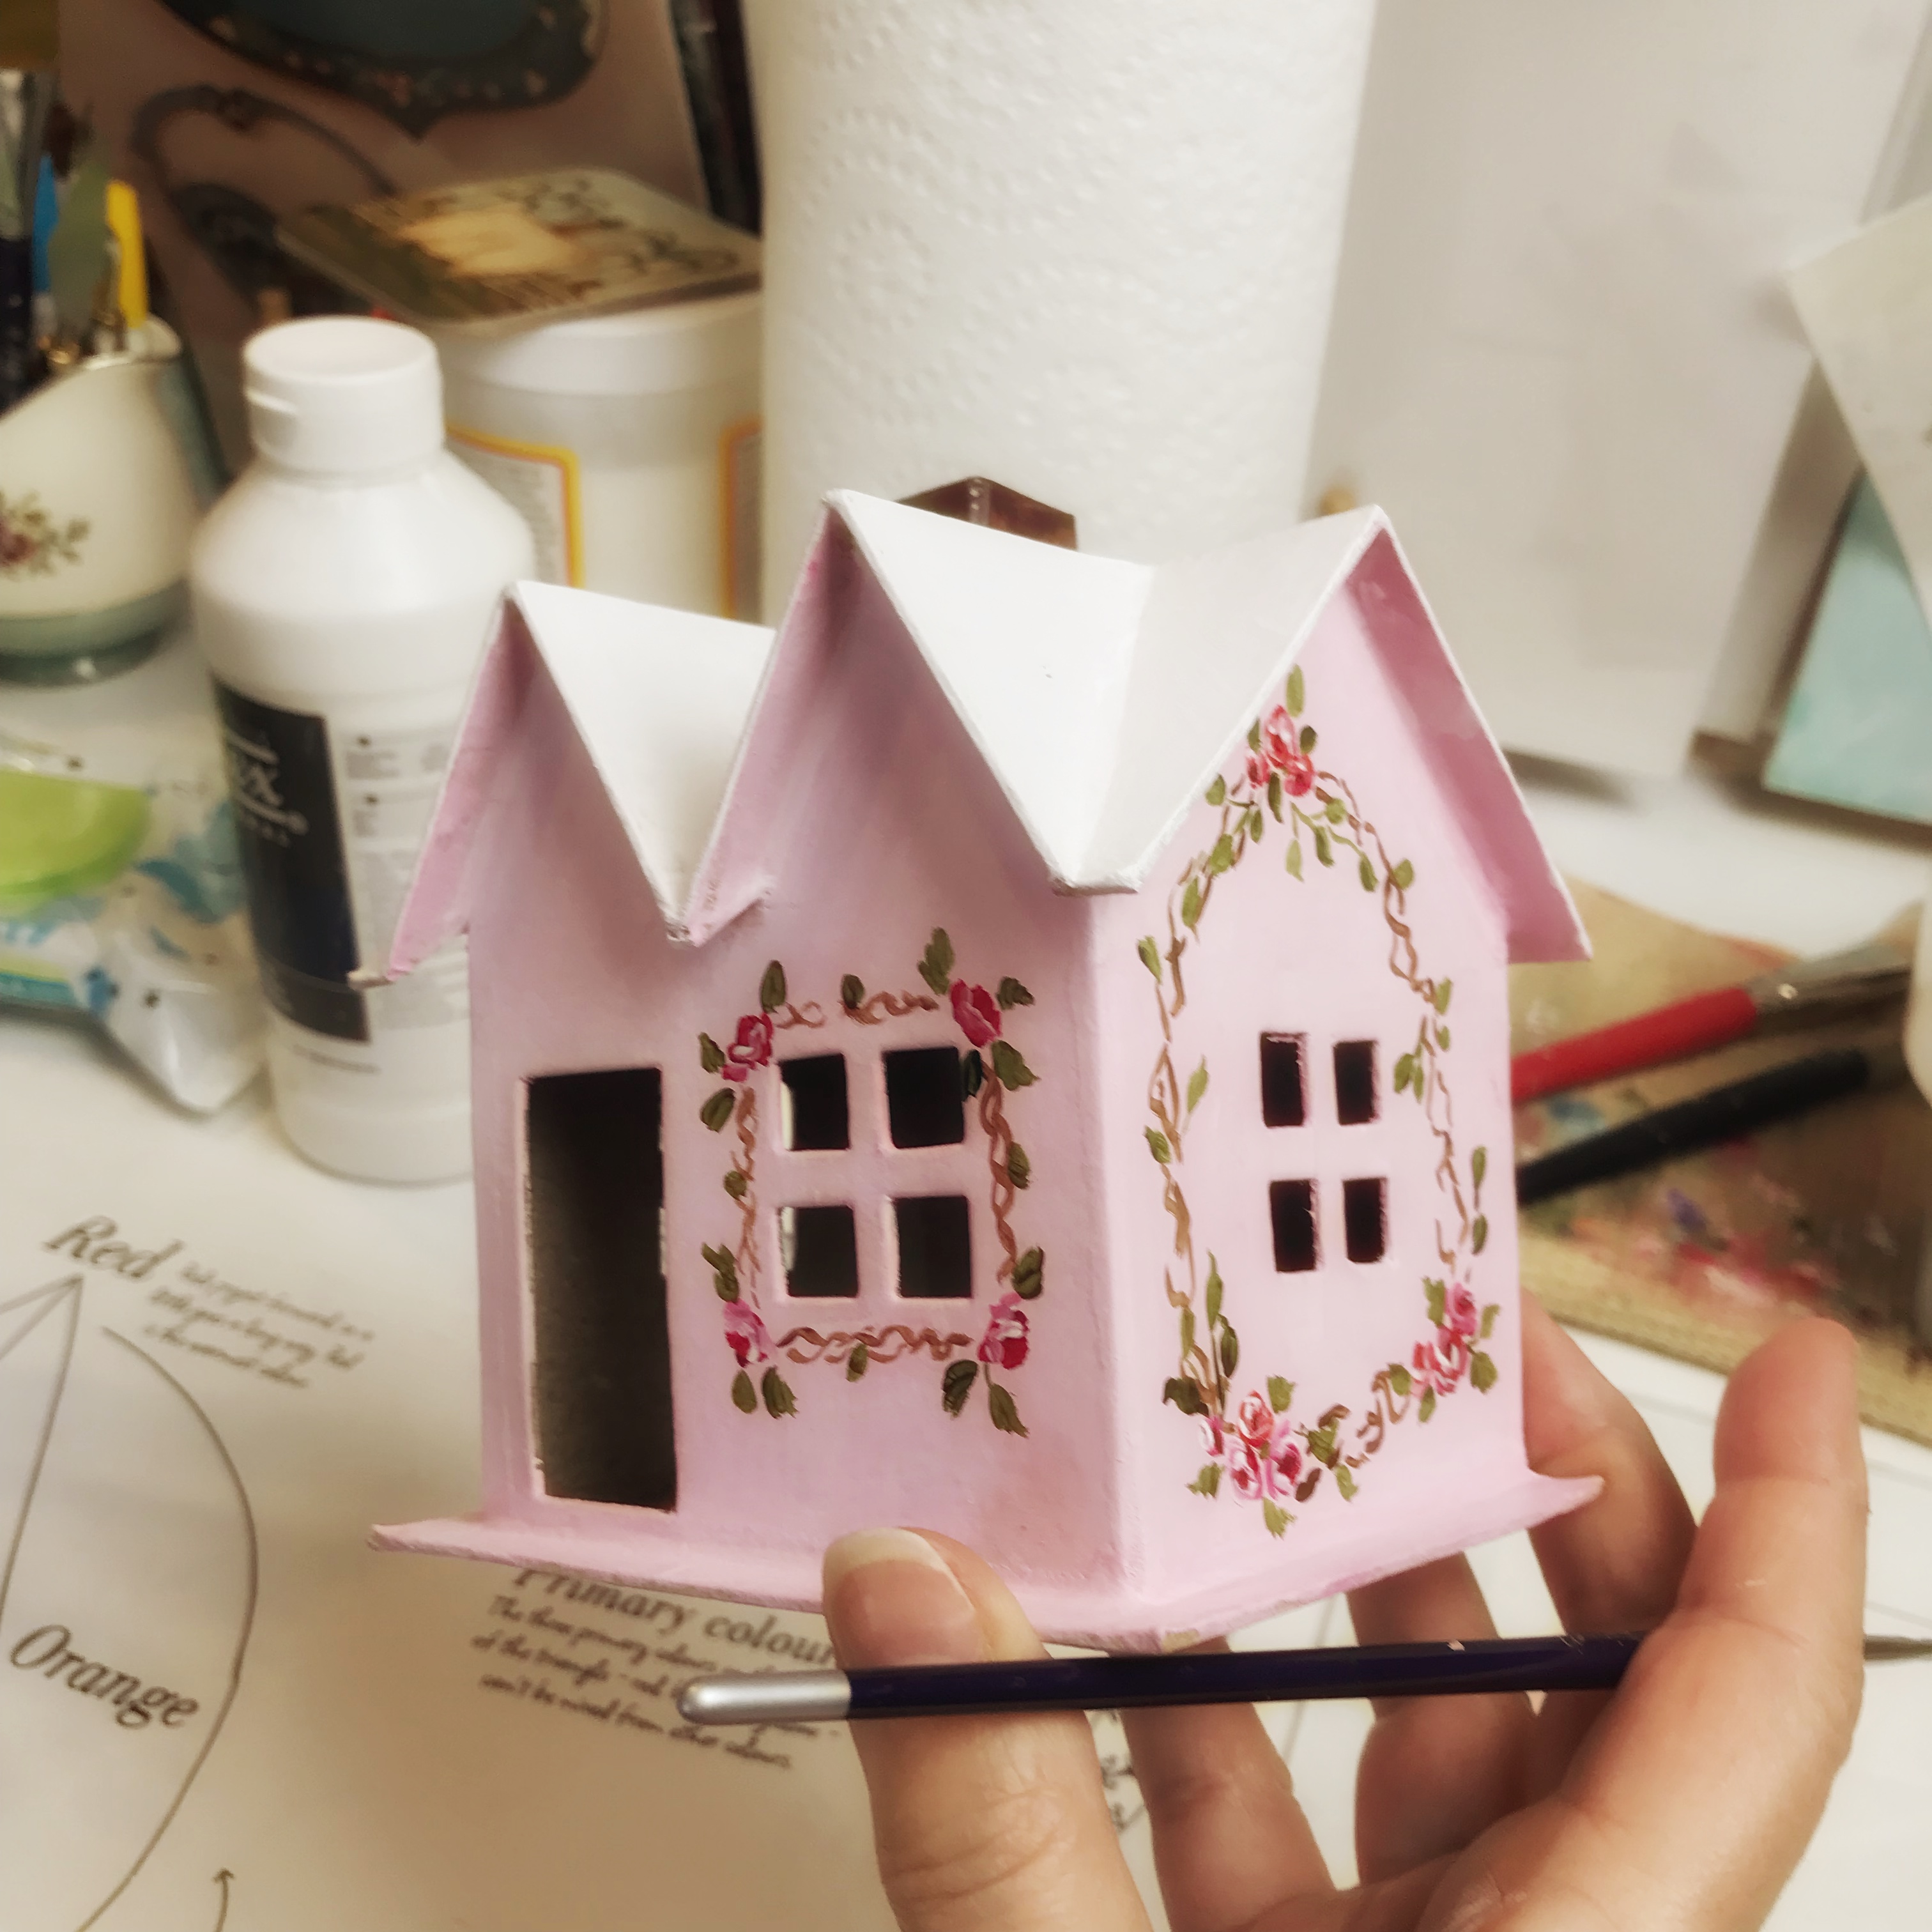
I started by painting it a soft pink (of course).
I then painted some dainty rose garland on the sides and around the front window.
If you don't feel comfortable with a paint brush, you could get the same look with decoupage.

I also taped some vellum paper inside the windows.
Patterned paper would be pretty also.

Here is the before and after.
I created a tinsel wreath for over the door by twisting some wired silver garland.
You could also use a mini wreath from the craft store.
I painted a raw piece of wood white and used it as a base for my putz scene.
I dug into my bottle brush stash and decide on varying sizes and colors to create my forest.

I created the snow on the ground using Snow-tex, one of my favorite holiday crafting supplies.
You can purchase Snow-tex online or at your local craft store.
I even glued some sticks together to mimic a stack of firewood 

  
Of course, the roof is very snow covered.

Snow on everything!

The shooting stars are a piece of vintage style star trim I bought a few years back.
I anchored the stars in a holiday paper straw behind the house.

Here she is!!
My holiday Putz house in the forest.
She will look pretty on my mantel this holiday season.
Santa is removable, so I can display my forest scene all winter long.
Oh....and of course the whole piece is heavily 
GLITTERED!!
But you knew that, didn't you?
You guys know me so well.
Imported German Glass Glitter
is my holiday staple.
You can find it
I'm happy to be checking this off my holiday bucket list. 
Are you inspired to create your own?


Thank you for visiting and as the Koreans are fond of saying...
"Stay healthy, eat good and sleep well!"
Hugs,
Janet xx

PS....Next time I will share how I transformed these little paper mache cones